Why Is My Lawn Mower Pull Cord Stuck After Sitting All Fall and How to Free It Without Breaking the Recoil Assembly

Photo by Bruno Krajski on Pexels
By Tondio Team · AI-generated content
Pull cord seized after winter storage? Learn how to diagnose a hydrolocked engine, frozen recoil spring, or debris — and free it without breaking anything.
Why Is My Lawn Mower Pull Cord Stuck After Sitting All Fall and How to Free It Without Breaking the Recoil Assembly
Don't yank it again. That single instinct — grabbing the pull cord and hauling back as hard as you can — is exactly what turns a $15 fix into a $120 recoil assembly replacement. Every spring, thousands of homeowners walk out to their garage, grab the handle of their mower after months of cold-weather storage, feel that dead, unmovable resistance, and immediately treat it like a strength test. Some snap the cord. Some crack the starter housing. Some do both.
A stuck pull cord after fall storage isn't a mystery. There are exactly three things that cause it, and only one of them requires any real mechanical effort to fix. The problem is that most people skip the diagnosis and go straight to brute force — and that's where the damage happens.
This guide will walk you through how to figure out what's actually wrong, how to fix each cause safely, and how to protect yourself from ever dealing with this again next spring.
Why Pull Cords Get Stuck After Fall Storage (And Why Cold Weather Makes It Worse)
Before you touch that cord again, you need to understand what you're actually dealing with. The starter rope itself is almost never the problem. The cord is stuck because something inside the engine or the recoil assembly is preventing the crankshaft from rotating — and pulling harder doesn't fix any of those things. It just adds rope damage to your list of problems.
There are three distinct causes, and they feel almost identical from the outside:
- Hydrolocked cylinder — liquid has pooled in the combustion chamber and the piston physically cannot compress it
- Seized or corroded recoil spring — the spring inside the starter housing has rusted or bound up and won't allow the rope to extend
- Debris or pest intrusion in the starter housing — leaves, rodent nesting material, or a wasp nest has physically jammed the mechanism
Each one requires a completely different response. Applying the wrong fix wastes time at best and breaks parts at worst.
Why Fall Storage Specifically Creates These Problems
When you store a mower in the fall without properly winterizing it, you're essentially locking in every problem that autumn created:
- Temperature swings between 35°F and 60°F cause condensation to form inside the engine cylinder, especially if the mower sat outside or in an uninsulated garage
- Old fuel left in the carburetor breaks down into a varnish-like residue over 30–90 days, which can also allow moisture to creep past the carburetor and into the cylinder
- Humidity above 70% — common in fall across most of the U.S. — accelerates recoil spring corrosion significantly
- Mice and other small animals actively seek out engine bays for winter nesting between October and December, and starter housings are a favorite spot
If you didn't run the fuel tank dry, didn't fog the cylinder with storage oil, and didn't cover the mower with a breathable cover before storage, you've set yourself up for at least one of these issues. The good news: all three are fixable without a trip to the repair shop.
Pro Tip: Use Tondio to set a seasonal equipment maintenance reminder every October — before temperatures drop below 45°F consistently. A 20-minute winterization routine eliminates every one of these spring startup problems before they start.
Step 1: Diagnose What's Actually Causing the Stuck Cord
Don't skip this step. Seriously. Spend 5 minutes here and you'll save yourself 2 hours of unnecessary disassembly.
The Resistance Test
Pull the cord slowly and deliberately — not a yank, just a firm, steady pull — and pay close attention to what you feel:
- Completely immovable, like pulling against a wall → Almost certainly a hydrolocked engine. The piston has zero compression relief because liquid is filling that space.
- Moves slightly (1–2 inches) then stops hard → Could be hydrolock, could be debris in the starter housing. Needs more investigation.
- Cord pulls out but won't retract → This is a recoil spring issue, not a stuck cord — that's a different problem entirely.
- Grinding or crunching sensation → Debris in the starter housing, possibly pest nesting material wrapped around the spindle.
- Cord moves fine but engine feels heavy and sluggish → Possible seized piston from lack of lubrication, which is a more serious mechanical problem.
The Spark Plug Test for Hydrolock
If your resistance feels like that first bullet — absolute zero movement — do this before anything else:
- Disconnect the spark plug wire and tuck it away from the plug
- Remove the spark plug using a 5/8-inch spark plug socket
- Point the plug hole away from yourself and anything flammable
- Pull the cord slowly — if liquid sprays or drips out of the cylinder, you have a hydrolocked engine
- If nothing comes out and the cord still won't move, you're dealing with a mechanical issue in the recoil assembly or a seized engine
This test takes 4 minutes and gives you a definitive answer. Don't skip it.
Pro Tip: Take a photo of the spark plug before and after removal using Tondio's photo documentation feature. Plug condition — carbon fouling, oil deposits, unusual coloring — tells you a lot about what's been happening in that cylinder all fall. That photo becomes useful context if the problem persists or if you ever need to discuss the issue with a small engine mechanic.
How to Fix a Hydrolocked Engine Safely
A hydrolocked engine is the most common cause of a completely seized pull cord after fall storage, and it's also the easiest to fix if you handle it correctly. The liquid in your cylinder is usually a combination of condensation water, residual fuel, and oil — none of which the piston can compress, which is why the engine locks up completely.
What You'll Need
- 5/8-inch spark plug socket and ratchet
- Clean rags or shop towels
- Penetrating oil (PB Blaster or equivalent) — optional
- Fresh spark plug (recommended but not required)
- Eye protection
The Fix, Step by Step
Step 1: Remove the spark plug (if you haven't already from the diagnostic step). Set it aside — inspect the electrode for rust, oil fouling, or carbon deposits while you're at it.
Step 2: With the plug removed, tilt the mower so the spark plug hole faces downward toward the ground. Let it drain for 3–5 minutes. You may see liquid running out — that's exactly what you want.
Step 3: Return the mower to its upright position and pull the cord 6–8 times slowly. This acts like a pump, pushing any remaining liquid out through the plug hole. Keep the plug hole pointed away from yourself. Have a rag ready — this can get messy.
Step 4: Let the cylinder air out for 10–15 minutes. This allows any remaining moisture to evaporate. Don't rush this step.
Step 5: Add a small engine cylinder lubricant (or a teaspoon of clean motor oil directly through the spark plug hole). Pull the cord 2–3 more times to distribute it. This protects the cylinder walls which may have had their oil film stripped by the water intrusion.
Step 6: Reinstall the spark plug. If the old plug showed rust, heavy fouling, or a corroded electrode, replace it now. A fresh NGK or Champion plug appropriate for your engine costs $3–$6 and eliminates one more potential startup variable. Torque to approximately 15 ft-lbs — snug, but don't overtighten.
Step 7: Reconnect the spark plug wire and attempt a normal start. It may take 4–6 pulls to clear any remaining residue and fire up. Expect some white smoke on the first start — that's the remaining moisture burning off. It's normal and will clear within 30–60 seconds.
Common Mistakes to Avoid
- Don't try to start the engine with the spark plug removed. Fuel vapor can spray out, creating a fire hazard.
- Don't use starting fluid (ether) after a hydrolock. If any liquid remains in the cylinder, you could cause a pressure spike that damages the rod or head gasket.
- Don't ignore what caused the hydrolock. If condensation was the culprit, you have a moisture intrusion problem — check the air filter, fuel cap vent, and carburetor drain for next fall.
Pro Tip: After fixing a hydrolock, log the incident in Tondio with a note about what you found (liquid color, volume, plug condition). If it happens again next spring, you'll have documentation that points to a recurring issue — like a compromised carburetor float or a cracked fuel cap that needs replacing.
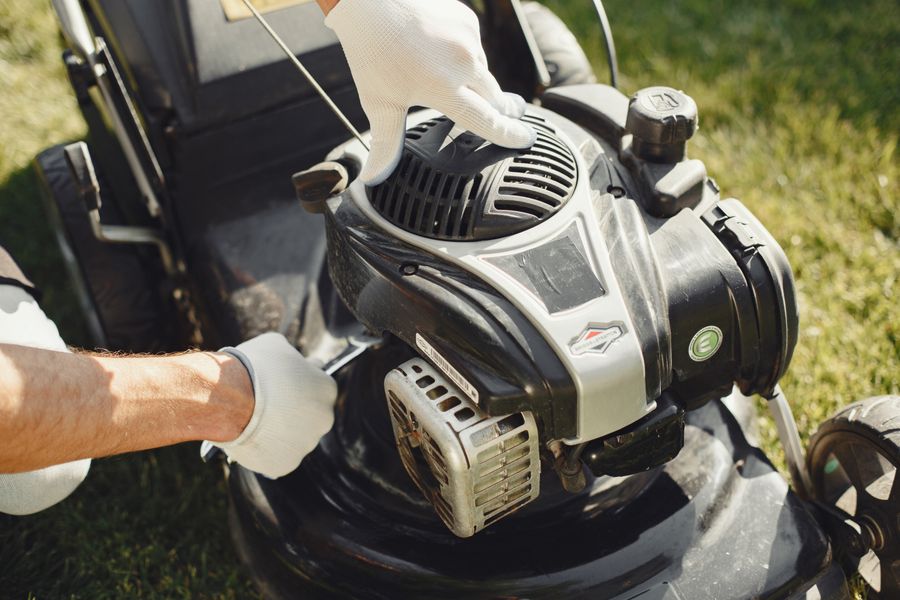
Photo by Gustavo Fring on Pexels
How to Diagnose and Free a Seized Recoil Spring
If your spark plug test ruled out hydrolock and the cord still won't move — or moves with a grinding resistance — you're dealing with the recoil assembly itself. This is where people get into trouble, because the recoil starter housing looks simple but has a few ways to go wrong if you force it.
Understanding the Recoil Assembly
The recoil starter is a self-contained unit typically bolted to the top of the engine with 3–4 bolts. Inside it, there's a flat coil spring (the recoil spring) wrapped around a central spindle. When you pull the cord, it unwinds the spring; when you release, the spring rewinds it. After 4–6 months of humid storage, that spring can rust or bind, especially if the mower was stored near a concrete floor (which wicks moisture upward) or in a space with poor airflow.
Debris intrusion — nesting material, packed leaves, or a wasp nest — can also physically block the spindle from rotating.
Inspecting the Starter Housing (Without Disassembly)
Before you pull the housing off, try this:
- Look through any gaps or vents in the starter housing with a flashlight. Can you see obvious debris — leaves, foam, nesting material — packed around the mechanism?
- Try rotating the pull cord handle gently in a circular motion while applying light tension. Sometimes a lightly bound recoil spring will break free with a bit of gentle coaxing rather than a straight pull.
- Apply a small amount of penetrating lubricant (WD-40 or PB Blaster) through any available gap near the spindle. Wait 10 minutes and try the gentle rotation again.
If this frees the cord, great — but don't stop there. Remove the housing anyway to clean out any rust or debris before the season starts.
When to Remove and Service the Recoil Assembly
Remove the housing if:
- The light coaxing approach didn't work after 10 minutes
- You can see visible debris inside
- The cord moves but feels rough or gritty throughout its travel
- The cord pulled free once but seized again immediately
Removing the recoil assembly is straightforward on most walk-behind mowers:
- Disconnect the spark plug wire (always)
- Locate the 3 or 4 bolts holding the recoil housing to the engine shroud (usually 8mm or 10mm, occasionally a Torx head)
- Remove the bolts and lift the assembly straight up and off
- Inspect the housing interior — clean out any debris with compressed air or a dry brush
- Inspect the recoil spring for rust, kinking, or visible corrosion
The Critical Warning About Recoil Spring Tension
Here's where you can really hurt yourself or break things: the recoil spring is wound under significant tension. If you remove the center retainer or the spindle without controlling the spring, it can uncoil explosively — hitting your hand, your face, or cracking the plastic housing.
Do this safely:
- Hold the housing face-down (spring side up) over a workbench
- If you need to remove the spring, wear gloves and eye protection
- Never use a screwdriver to pry or lever the spring — use only fingers or needle-nose pliers
- If the spring is badly corroded or kinked, replace the entire recoil assembly rather than trying to rewind a damaged spring — a replacement unit runs $20–$45 for most common mowers and comes pre-tensioned
When to Stop and Call a Pro
Don't try to force the recoil assembly if:
- The cord won't move at all even with the spark plug removed (suggests a seized piston — a much larger mechanical problem)
- The plastic housing shows visible cracking or stress marks from previous forced pulls
- The spring has visibly snapped or you can hear loose metal rattling inside the housing
A small engine shop typically charges $40–$75 for recoil assembly service. That's a lot cheaper than a replacement engine or a new mower.
Checking for Debris and Pest Damage in the Starter Housing
If your cord has a grinding or crunching resistance, or if it moves erratically rather than smoothly, debris is the most likely culprit. This is the easiest fix of the three.
What to Look For
- Mouse nesting material (shredded paper, insulation foam, grass clippings) packed around the spindle — mice can fit through openings as small as 1/4 inch and love the warmth and shelter of engine housings
- Wasp or mud dauber nests built inside the housing during late summer and fall — these can be surprisingly dense and are often found in gas-powered equipment stored between August and October
- Compacted leaf debris from storage under trees or without a cover
- Acorn or seed caching from squirrels — yes, this happens more than you'd think
Clearing Debris Safely
- Remove the recoil housing (following the steps above)
- Clear debris with compressed air first — blow from the inside out
- Use a dry brush or old toothbrush for anything stuck to the spindle or housing walls
- Check for mouse urine or droppings — if present, wear a mask and gloves, as rodent waste can carry Hantavirus. Wipe down with a 10% bleach solution and let dry completely before reassembly
- Inspect the rope itself for fraying or rodent chewing — a chewed cord should be replaced before you rely on it again (replacement cord typically costs $5–$8 for a 5-foot length of #4 or #4.5 diameter rope)
- Reassemble, reconnect the spark plug wire, and test the pull
Spring Startup Action Checklist
Run through this before you pull that cord for the first time each spring:
- Perform the resistance test — identify pull cord behavior before applying any force
- Remove the spark plug and perform the hydrolock test if cord is completely immovable
- Drain and air out the cylinder if liquid is present; add a teaspoon of oil before reinserting plug
- Inspect the starter housing visually for debris or pest intrusion through any visible gaps
- Apply penetrating lubricant near the spindle and wait 10 minutes before attempting to free a stiff cord
- Remove the recoil housing if the cord is grinding or won't free with gentle coaxing
- Replace the recoil assembly if the spring is corroded, kinked, or has snapped — don't try to force a damaged spring
- Check and replace the spark plug if it shows rust, heavy fouling, or a corroded electrode
- Log the issue in Tondio with notes and photos for future reference
- Set a fall maintenance reminder so this doesn't happen again next year
Next Fall, Do These 4 Things Before You Park the Mower
The best time to fix a spring startup problem is the previous fall. These four steps take less than 20 minutes and eliminate all three causes of a stuck pull cord:
-
Run the fuel tank completely dry or add a fuel stabilizer like Sta-Bil (1 oz per 2.5 gallons) and run the engine for 5 minutes to distribute it through the carburetor. This prevents fuel breakdown and moisture intrusion through the fuel system.
-
Fog the cylinder with storage oil. Remove the spark plug, spray 2–3 seconds of engine fogging oil directly into the cylinder, pull the cord 3–4 times to distribute it, and reinstall the plug. This maintains a protective oil film on cylinder walls all winter and prevents the corrosion that can seize a piston.
-
Cover the air intake and exhaust with a clean rag or foam plug to prevent pest entry. Remove these before starting in spring — a reminder note taped to the pull cord handle works well.
-
Store the mower on a shelf or pallet rather than directly on a concrete floor. Concrete is hygroscopic and significantly increases the moisture environment around anything stored on it, accelerating recoil spring corrosion.
Pro Tip: Tondio lets you log equipment notes and set recurring seasonal reminders tied to your specific mower. Set a winterization task for the first week of November, and a spring startup checklist reminder for late March or early April depending on your climate zone. You'll never walk out to a seized pull cord again.
The Bottom Line
A stuck pull cord after fall storage is almost always fixable in under an hour with basic tools — but only if you diagnose it before you force it. The cord isn't the problem. The problem is in the cylinder or the recoil assembly, and brute force makes both of those things worse.
Run the resistance test. Pull the spark plug. Check for liquid. If it's hydrolock, drain it and move on. If it's the recoil spring or debris, take the housing off and deal with it properly rather than cracking it. And if the piston itself is seized, stop and call a shop — that's a repair that earns its labor cost.
Most importantly, make a note of what you found this spring so that next fall, you take the 20 minutes to winterize properly. A stuck pull cord is an avoidable problem, and the best version of this troubleshooting guide is one you never need to read again.