Why Is My Lawn Mower Not Starting After Sitting All Fall and How to Fix It Before It Gets Worse

Photo by Joel Hägele on Pexels
By Tondio Team · AI-generated content
Mower won't start after sitting all fall? Learn how to diagnose and fix the most common causes before the damage gets expensive.
Why Is My Lawn Mower Not Starting After Sitting All Fall and How to Fix It Before It Gets Worse
Your mower cranks, cranks, cranks — and nothing. You've got leaves to mulch, one last cut to squeeze in before winter, and your machine is completely dead after sitting in the garage for the past six to eight weeks.
Here's the frustrating truth: this is almost always preventable, but it's also almost always fixable — and you probably don't need a repair shop to do it. The specific failure modes that develop when a mower sits unused during fall are different from other no-start situations, and once you understand what's actually happening inside the engine, the fix becomes obvious.
This guide walks you through a step-by-step diagnosis — testing spark, fuel, and compression in the right order — so you're not throwing parts at a problem you haven't identified yet. Let's get it running.
What Fall Storage Actually Does to Your Mower (It's Not What You Think)
Most people assume a mower sitting idle is just... sitting. Nothing happening, no damage accumulating. That's wrong.
Warm fall temperatures — anything above 60°F — accelerate fuel degradation significantly faster than cold storage. If your mower sat through September and October in a garage that stays in the 60-75°F range, that fuel was actively breaking down the entire time. Ethanol-blended gasoline (which is most gas sold in the U.S. today) starts oxidizing and separating in as little as 30 days under warm conditions. By the 4-6 week mark, you can have varnish and gum deposits forming inside the carburetor's tiny fuel passages — passages that are sometimes less than 1mm in diameter.
That's why a mower that ran perfectly in mid-September can be completely dead by late October. It's not a mechanical failure. It's chemistry.
The Three Things That Go Wrong During a Fall Sit
- Stale fuel gums the carburetor — Oxidized gas leaves behind a sticky, lacquer-like residue that clogs jets and needle valves. This is the #1 cause of fall no-starts.
- The spark plug fouls or corrodes — A plug that was borderline serviceable in September can fully fail after weeks of thermal cycling and moisture exposure in an unheated garage.
- The primer bulb hardens or cracks — Rubber deteriorates from fuel exposure and temperature swings. A brittle primer bulb can't pull fuel into the carb, so the engine never gets its initial fuel charge.
Understanding which one (or which combination) is killing your mower is the whole game. So before you buy anything, run through this diagnostic sequence.
Step 1 — Check Spark First (Takes 5 Minutes, Saves You Hours)
Always start with spark. It's the fastest thing to test and rules out the most catastrophic problems. If you have no spark, nothing downstream matters.
How to Test Your Spark Plug
- Disconnect the spark plug wire (it pulls straight off — just grab and pull).
- Use a spark plug socket (usually 5/8-inch for most walk-behind mowers) to remove the plug.
- Look at the electrode. A healthy plug is light gray or tan. If it's black and sooty, oil-fouled, or the electrode is visibly worn down, replace it now. A new plug costs $3-6 and takes two minutes to install.
- To test for actual spark: reconnect the plug wire to the old plug, hold the threaded part of the plug against a metal part of the engine block (ground it), and crank the engine. You should see a bright blue spark. An orange or yellow spark is weak and unreliable. No spark means you have an ignition problem beyond the plug itself.
If you get a strong spark: Move on to fuel. Your ignition system is fine.
If you get a weak or no spark after replacing the plug: You may have a failing ignition coil or a safety switch issue. Check that your blade engagement lever, seat switch (on riding mowers), and bail lever are all fully engaged before assuming the coil is dead.
Pro Tip: Keep a record of when you last replaced your spark plug. Tondio lets you log maintenance events with dates so you're never guessing whether that plug is 1 year old or 4 years old when it matters most.
Step 2 — Diagnose Fuel Flow (This Is Where 60% of Problems Live)
If your spark is good, the carburetor is almost certainly your problem. Here's how to confirm it and fix it without automatically assuming you need a new carb.
The 30-Second Fuel Test
Before touching the carburetor, confirm fuel is actually reaching it:
- Close the fuel shutoff valve (if your mower has one — usually a small lever on the fuel line near the tank).
- Place a small container below the fuel line.
- Disconnect the fuel line from the carburetor inlet.
- Open the shutoff valve and watch for fuel flow. It should flow freely in a steady stream.
If fuel isn't flowing: Check for a clogged fuel filter (a $4-8 part you should replace annually anyway) or a kinked fuel line. Replace the filter first — it's the most likely culprit.
If fuel flows freely to the carb: The blockage is inside the carburetor itself. This is where stale fall gas does its damage.
The One 20-Minute Fix That Solves 60% of No-Start Issues
Clean the carburetor with carb cleaner spray before you do anything else.
This is not the same as a full carburetor rebuild. This is a quick external and partial internal cleaning that clears varnish deposits from the main jet and needle valve — the two spots that stale fuel gums up first. Here's how:
- Remove the air filter and air filter housing. Usually 1-2 screws or a single wing nut. Set the filter aside — don't get carb cleaner on it.
- Locate the main jet. On most small Briggs & Stratton, Honda, or Kawasaki engines, there's a small brass screw on the bottom of the carburetor bowl. This is your main jet. Remove it carefully with a flathead screwdriver.
- Spray carb cleaner through the jet hole. You should see it spray out the other side of the passage. If it doesn't pass through freely, the passage is clogged. Spray and wait 60 seconds, then spray again. A thin wire from a twist tie can help clear stubborn deposits — but be gentle. These passages are tiny.
- Remove the float bowl (the small cup on the bottom of the carb held by the jet bolt you already removed). Pour out any old fuel. If the fuel looks dark, smells sour, or has a varnish film on the bowl walls, you've found your problem.
- Spray carb cleaner into every port and passage you can see. Let it soak for 2-3 minutes.
- Reassemble, add fresh fuel, and try to start.
Fresh fuel means fresh fuel. Don't pump old gas from a can that's been sitting in your garage since July. Use gas that's less than 30 days old, ideally with a fuel stabilizer already mixed in at a ratio of 1 oz stabilizer per 2.5 gallons of fuel.
Common Mistake: Skipping the bowl drain and just spraying cleaner around the outside of the carb. The gum deposits are inside the brass passages — you have to get the cleaner directly into those ports to dissolve them.
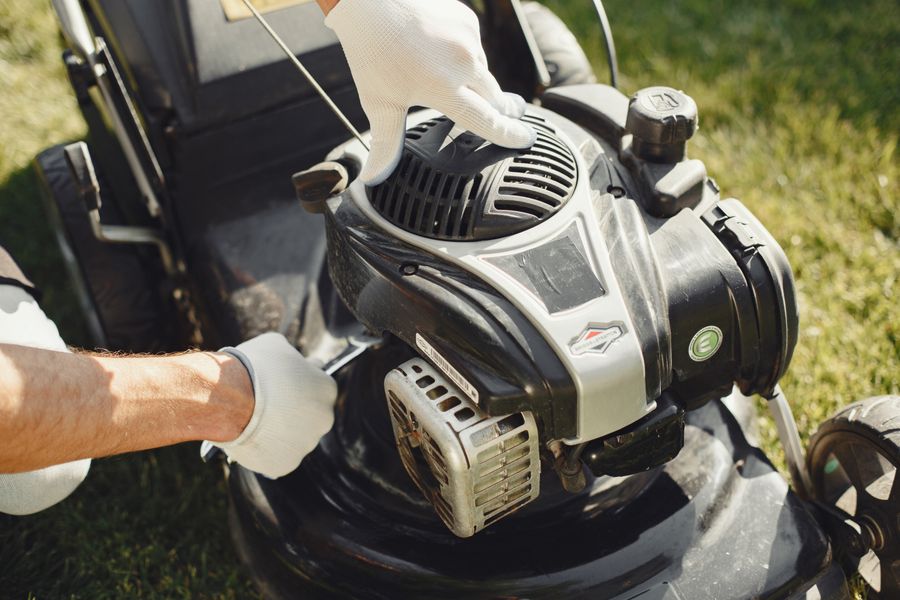
Photo by Gustavo Fring on Pexels
When the Carb Needs a Full Rebuild or Replacement
If you've cleaned the carb thoroughly and the mower still won't start (or starts and immediately dies), the needle valve and seat may be too far gone to clean. A carburetor rebuild kit typically costs $8-15 and includes a new needle, float, and gaskets. Full replacement carburetors for common engines run $15-40 on Amazon or at any small engine shop — often cheaper than paying a shop to rebuild the original.
Pro Tip: Take a photo of how your carburetor is assembled before you disassemble it for a rebuild. Even better — Tondio's photo documentation feature lets you attach images directly to your equipment's maintenance log, so you have a reference any time you need it.
Step 3 — Check Compression (Only If Spark and Fuel Are Both Fine)
If you have confirmed spark and confirmed fuel delivery but the engine still won't fire, you need to check compression. Low compression means the engine can't generate enough pressure to ignite the fuel-air mixture, and it's usually a sign of a more serious internal problem.
How to Do a Basic Compression Test
A compression tester costs about $20-30 at any auto parts store and is worth owning. Here's how to use it:
- Remove the spark plug.
- Thread the compression tester into the spark plug hole.
- Hold the throttle wide open and crank the engine 4-5 times.
- Read the gauge.
What the numbers mean:
- 90 PSI or above: Compression is acceptable for a small engine. Look elsewhere.
- 60-89 PSI: Borderline. The engine may start but will run poorly. Could indicate worn rings.
- Below 60 PSI: Significant internal wear or damage. Possibly a blown head gasket or stuck/broken rings.
For most residential walk-behind mowers, you should see 90-120 PSI when the engine is healthy.
Common Mistake: Testing compression on a cold engine and panicking at a low reading. Run the engine briefly with starting fluid first (if it fires at all), or at least pull the recoil cord 20-30 times to get the cylinder walls slightly lubricated before testing.
If compression is severely low: At this point, you're looking at an engine rebuild or replacement. For a mower that's more than 8-10 years old, it may be more economical to replace the mower entirely. For a newer or high-end machine, an engine rebuild or short-block replacement is worth exploring.
Don't Overlook These 3 Sneaky No-Start Causes
Before you dive deep into the carburetor or compression testing, check these fast and easy items. They cause more no-starts than you'd expect:
- Old or degraded primer bulb: Press it — it should feel soft and spring back firmly. If it's cracked, hard, or collapsed, it won't prime the carb with fuel. Replacement bulbs cost $3-7 and take 10 minutes to swap.
- Choke set incorrectly: A cold engine needs full choke to start. Many beginners run partial choke and wonder why the engine won't catch. Full choke for a cold start, move to half or open choke once it fires.
- Safety interlock switches: Riding mowers have multiple safety switches (seat, PTO, brake). If any of them fail or get dirty, the engine won't start at all — even with perfect fuel and spark. Test by temporarily bypassing one at a time, but make sure you re-engage them after. Never permanently disable safety switches.
Your Fall No-Start Diagnostic Checklist
Work through this in order. Don't skip ahead.
- Check fuel age — is it older than 30 days? Replace it.
- Inspect and test spark plug — replace if fouled, worn, or producing weak/no spark.
- Check primer bulb — soft, flexible, no cracks? Replace if needed.
- Confirm choke is set to full closed for cold start.
- Check safety interlock switches (riding mowers).
- Test fuel flow from tank to carb — replace fuel filter if flow is weak.
- Remove carburetor bowl, inspect for varnish, clean all passages with carb cleaner.
- Reassemble with fresh fuel + stabilizer and attempt restart.
- If still no-start: perform compression test.
- If compression is below 60 PSI: consult a small engine shop or evaluate replacement.
Pro Tip: Log every step you take — what you tested, what you found, what you replaced — directly in Tondio so you have a complete maintenance history for your equipment. If you end up at a repair shop, that log saves time and money by telling the tech exactly what's already been ruled out.
How to Make Sure This Never Happens Again
The fix for a fall no-start is almost always straightforward. The prevention is even easier.
Before your mower sits for more than 3-4 weeks — especially in temperatures above 60°F — do this:
- Add fuel stabilizer to a full tank of fresh gas (full tanks limit condensation and oxidation). Run the engine for 2-3 minutes to circulate stabilized fuel through the entire system, including the carb.
- Or alternatively: run the engine until it dies from fuel starvation. An empty carb can't gum up.
- Remove and inspect the spark plug. Replace it if it's been more than a season.
- Check and clean the air filter.
That's it. Twenty minutes of prep prevents the exact situation you're in right now.
Set a reminder so you actually do it. Tondio lets you schedule maintenance reminders tied to your specific mower, so you'll get a nudge when it's time to winterize — not after you've already missed the window.
The Bottom Line
A mower that won't start after sitting all fall is almost never dead — it's just clogged, fouled, or starved for clean fuel. In the majority of cases, a fresh spark plug and a 20-minute carburetor cleaning are all it takes to bring it back to life. Work through spark, then fuel, then compression — in that order — and you'll find the problem without wasting money on parts you don't need.
Don't let one last cut of the season turn into a full repair bill. Work through this checklist methodically, use fresh fuel with stabilizer, and your mower will start the next time you need it too.
Got your mower running again? Log the fix in Tondio so next fall, you'll know exactly what this machine needed — and you won't be starting from scratch.