Why Is My Lawn Mower Sputtering Under Load and the 5 Parts to Check Before Calling a Shop

Photo by Joel Hägele on Pexels
By Tondio Team · AI-generated content
Mower sputtering when cutting but fine at idle? Here's the exact 5-part diagnostic checklist to fix load-related sputtering before calling a shop.
Why Is My Lawn Mower Sputtering Under Load and the 5 Parts to Check Before Calling a Shop
Your mower runs perfectly fine sitting in the driveway — smooth, steady, no complaints. The second you drop the deck and hit a real patch of grass, it stumbles, coughs, and sounds like it's about to quit on you. That's not a quirk. That's a specific mechanical symptom telling you something very specific is wrong.
Here's the thing most generic troubleshooting articles miss: sputtering under load is not the same problem as surging at idle or hard starting. Those are different failure modes with different causes. If you're Googling "why does my mower sputter" and getting advice about choke settings or stale gas from winter storage, you're probably chasing the wrong fix. Load-related sputtering means your engine is handling light-duty demand just fine — it's only when the system gets stressed that something in the fuel, air, or mechanical chain can't keep up.
This guide is built around that exact symptom. We'll confirm it's truly load-related, then walk you through the five components most likely responsible — in the order you should actually check them — without needing a single specialized tool.
First: Confirm It's Actually Load-Related (The Throttle Test)
Before you touch anything, spend 60 seconds confirming what you actually have. This matters because the fix for a carburetor issue looks completely different from the fix for a dragging deck belt.
How to Run the Throttle Test
- Start your mower and let it warm up for 2–3 minutes at full throttle with the blade disengaged.
- Listen carefully. Is the engine smooth and consistent? Good — that rules out idle circuit problems, carburetor float issues, and most ignition misfires at rest.
- Now engage the blade (PTO switch or blade lever, depending on your mower).
- Drive into grass at your normal cutting pace and listen for the sputter.
- Key diagnostic step: Release the blade engagement mid-pass. Does the sputtering immediately stop and the engine smooth out?
If yes — your problem is 100% load-related. The engine is healthy enough at rest but can't sustain performance when real demand is placed on it. Everything that follows is aimed directly at your problem.
If the engine sputters even with the blade disengaged while you're moving, you may have a different issue — possibly a governor problem or a fuel delivery restriction unrelated to blade drag. That's a separate diagnosis.
Pro tip: Use Tondio to log the exact conditions when the sputter started — outside temp, grass height, how many hours were on the engine. Patterns like "only sputters when grass is above 4 inches" or "started after the third mow of the season" are gold when narrowing down a cause.
Why Sputtering Under Load Is Mechanically Different
When your engine is idling or running with no blade, it's pulling a minimal fuel-air mixture through the carburetor's idle circuit. The moment the blade engages, the engine demands significantly more fuel — routed through the main jet rather than the idle circuit. At wide-open throttle under cutting load, a typical single-cylinder mower engine can see cylinder temperatures climb above 400°F and fuel demand can increase by 30–50% compared to no-load idle.
That's why a partially clogged main jet in your carburetor shows zero symptoms at idle but causes classic load-related sputtering the second you engage the blade. The idle circuit is clean enough to work fine. The main jet is just restricted enough that it can't deliver the fuel volume needed under stress.
The same logic applies to air restriction, spark degradation under heat load, and mechanical drag from a worn belt or dull blade. None of these show their true face until the engine is actually working. This is also why throwing a new air filter at a surging-idle problem (a common online suggestion) will do absolutely nothing for your situation.
The 5 Parts to Check Before Calling a Shop
Work through these in order. The first two take under 5 minutes each and cost nothing if the parts are clean. The further down the list you go, the more likely you've found your culprit.
1. Air Filter
Start here every single time. A clogged air filter is the most common cause of load-related sputtering, it's free to check, and takes about 90 seconds to inspect.
When your engine is under cutting load, it's pulling hard on the air supply. A filter that looks "okay" at idle may be too restricted to deliver adequate airflow at full throttle, which leans out the fuel-air mixture and causes the engine to sputter and stumble.
How to check it:
- Remove the air filter housing cover (usually one knob or two clips — no tools needed).
- Pull out the filter element and hold it up to the sky or a bright light.
- If you can't see light through a paper filter, or a foam filter looks dark gray/brown and feels stiff or greasy, replace it immediately.
- Give a paper filter a firm tap on a hard surface and see how much debris falls out. If it looks like a sandstorm, that filter is choking your engine.
The numbers: Most small engine manufacturers recommend replacing paper air filters every 25 hours of operation or once per season, whichever comes first. Foam pre-filters should be cleaned with dish soap and water, dried completely, and re-oiled every 10 hours in dusty conditions. If you're mowing in summer heat through dry, sandy turf, you may need to check it every 5–8 hours.
Common mistake: People tap out the filter, call it good, and put it back. If the filter is more than one season old and you're having performance problems, just replace it. A new filter for most small engines costs $5–$12. That's not a parts gamble worth skipping.
Pro tip: Log your air filter replacements in Tondio with the engine hours at replacement. Most enthusiasts are shocked how fast they hit 25 hours during summer. When your mower starts acting up, you'll immediately know whether you're 8 hours overdue or right on schedule.
2. Fuel Filter
If the air filter checks out, move to fuel delivery. A partially clogged fuel filter restricts flow at a rate that idle demand never exposes — but full-throttle cutting demand absolutely does.
In hot summer temperatures (consistently above 85°F), older ethanol-blended fuel also tends to degrade faster and leave varnish deposits in filters and fuel lines. If you're mowing in July and August, heat is actively working against your fuel system.
How to check it:
- Locate the inline fuel filter — on most walk-behind mowers it's a small translucent or opaque cylinder sitting in the fuel line between the tank and carburetor. On riding mowers it's often near the tank or tucked along the frame.
- With the fuel shutoff valve closed (if your mower has one), look at the filter's color and condition. A clean filter is typically clear or light tan. A clogged filter looks dark brown, has visible sediment inside, or feels stiff when you gently squeeze it (if it's a flexible type).
- If you don't have a shutoff valve, clamp off the fuel line with a pair of locking pliers wrapped in a rag before disconnecting the filter.
Replacement cost: Inline fuel filters for small engines typically run $4–$10 and take about 10 minutes to swap with nothing more than a flathead screwdriver and a rag.
The timing rule: Replace your fuel filter every season or every 50 hours, but bump that to every 25 hours if you're running ethanol blends (E10 or higher) in summer heat.
Pro tip: If you track your mowing sessions in Tondio and log your maintenance history, you can set a reminder for fuel filter replacement tied to hours — not just calendar date. That's far more accurate than "change it every spring" for anyone mowing 3–4 times a week in peak season.
3. Carburetor Main Jet (The Most Likely Culprit)
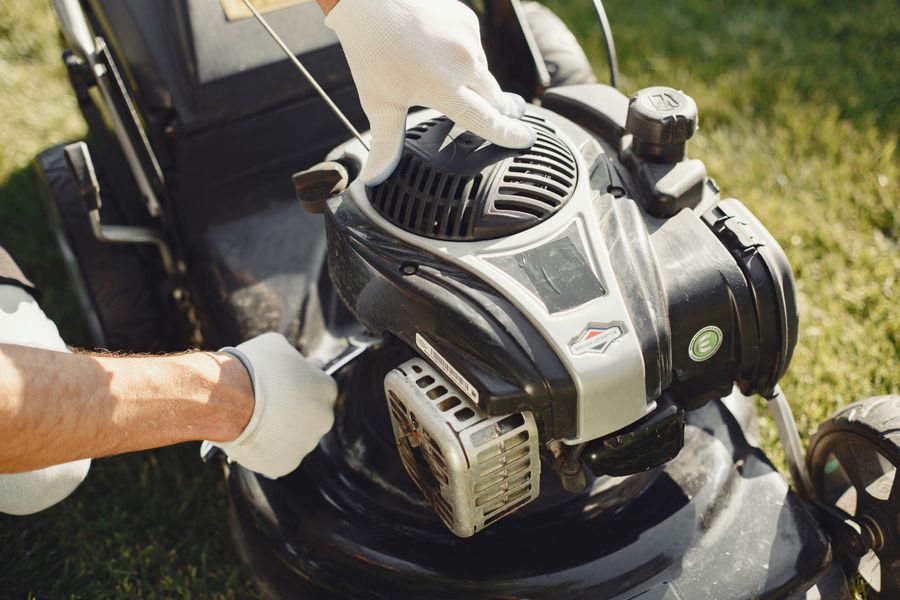
Photo by Gustavo Fring on Pexels
Here's where most load-related sputtering actually lives. The main jet is a tiny brass orifice — typically 0.5mm to 1.5mm in diameter — that meters fuel flow at full throttle. Even a partial varnish buildup can reduce flow enough to starve the engine under load while leaving idle operation completely unaffected.
This is especially common if you're running a mower that sat over winter with fuel in the bowl, or if you've been using ethanol-blended gas. Ethanol attracts water, and the resulting gum and varnish deposits love to settle right in the main jet.
How to Check and Clean the Main Jet (Without a Rebuild Kit)
You don't need to take the carb off the engine for a basic cleaning. Here's the accessible approach:
- Turn off the fuel shutoff valve or clamp the fuel line.
- Place a small container under the carburetor and remove the float bowl (usually a single bolt at the bottom of the carb, 10mm or 12mm).
- Look inside the bowl. If you see brown or tan varnish residue, dark sludge, or water separation (a distinct layer at the bottom), your fuel system has been sitting dirty.
- The main jet is the brass fitting in the center of the carb body above the bowl. It typically has a slot or Phillips head. Remove it carefully.
- Hold the jet up to light. You should see a clean, centered hole all the way through. If it looks cloudy, has visible buildup, or you can't see clearly through it, it needs cleaning.
- Use a can of carburetor cleaner and a single strand of steel wire brush (not a drill bit — you'll enlarge the orifice) to clear the jet. Spray cleaner through the jet until it runs clear.
- Reassemble, reconnect fuel, and test under load.
What not to do: Never use a toothpick or wooden object — they break off inside. Never drill the jet or use anything harder than the brass it's made from. And never assume the jet is fine just because the mower ran okay last season — varnish builds up slowly.
If cleaning doesn't resolve it and you're seeing heavy deposits, a full carburetor rebuild kit runs $8–$20 for most small engines and includes a new jet, needle, float valve, and gaskets.
Common mistake: People buy carb cleaner spray, shoot it into the air intake for 10 seconds, and call it a carburetor cleaning. That's not cleaning the main jet — that's just temporarily rinsing the throat. You need to get to the jet itself.
4. Spark Plug
A spark plug that fires reliably at idle may fail to deliver consistent ignition under the compression and heat load of full-throttle cutting. This is called a weak spark condition, and it only shows up when the plug is stressed.
Under cutting load, cylinder pressure increases significantly, and a plug with a worn electrode, fouled tip, or incorrect gap has to work much harder to fire across the gap. When it can't keep up, you get the classic stumble and sputter — often with a slight power recovery when you back off the throttle, which drops demand back into the range the plug can handle.
How to check it:
- Remove the spark plug with a plug wrench (typically 5/8" or 13/16" socket).
- Check the electrode tip. A healthy plug is light tan to grayish-white. Black and sooty means a rich mixture or oil fouling. White or blistered means it's running lean or overheating.
- Check the gap with a feeler gauge. Most small engine manufacturers specify 0.030" (0.76mm), though some run 0.020"–0.035" — check your engine's manual for the exact spec.
- If the electrode is worn, rounded, or the gap can't be adjusted back into spec, replace it. A new small engine plug costs $3–$8 and takes 5 minutes.
The heat-range factor: Summer mowing in 90°F+ weather means your engine is already running hotter than it was in spring. A plug that was marginal in May may fail completely under July load conditions. If your plug is more than 100 hours old, replace it regardless of how it looks.
Pro tip: Note the plug condition in your Tondio maintenance log with a photo. Over multiple seasons, a trend of consistently black plugs tells you something about your mixture or running habits that a single snapshot never would.
5. Deck Belt and Blade Drag
This one surprises people, but mechanical drag from a worn, glazed, or misaligned deck belt can place enough load on the engine to trigger sputtering — even when the fuel and ignition systems are perfectly healthy.
A deck belt that's beginning to slip creates an inconsistent load. Sometimes it grips, sometimes it slips, and the engine response oscillates with it — producing a sputter or stumble that sounds exactly like a fuel or ignition problem. A blade that's badly out of balance or hitting something (a deck baffle, a buildup of packed grass, a bent blade) creates the same inconsistent drag signature.
How to check it:
- Blade inspection: With the engine fully off, spark plug wire disconnected, and mower on a flat surface, physically rock the blade end to end. Any wobble beyond about 1/8" suggests a worn blade spindle bearing. Visually check for nicks, bends, or heavy buildup on the blade itself.
- Belt inspection: Remove the deck (or access the belt from under the deck, depending on your mower type). Look for:
- Glazed or shiny belt surface (indicates slipping and heat damage)
- Cracks in the belt body
- Fraying along the edges
- Visible stretching or uneven thickness
- A healthy belt is flexible, dark matte in color, and consistent in width throughout its length. A glazed belt should be replaced even if it hasn't snapped — it's costing you power and stressing your engine on every single pass.
Deck belt cost: Most walk-behind deck belts run $15–$35. Riding mower deck belts typically run $25–$60 depending on the model.
Common mistake: People replace the belt only after it breaks. A slipping belt is arguably more damaging than a broken one because it causes repeated thermal stress on the engine and spindles over dozens of hours before it finally fails.
Pro tip: If you've been tracking your mowing sessions in Tondio and notice the sputtering started correlating with a specific lawn — the heavily thatched backyard or the section with tree roots — that's a strong hint the blade or belt is intermittently catching on something physical, not a fuel or ignition problem.
Your Pre-Shop Diagnostic Checklist
Before you load the mower into the truck, run through this in order:
- Throttle test completed — confirmed sputter is load-related, not at idle
- Air filter inspected — replaced if older than 25 hours or visibly clogged
- Fuel filter inspected — replaced if dark, 50+ hours old, or running ethanol in summer heat
- Carburetor main jet checked — cleaned with carb cleaner and wire strand; bowl was free of varnish or sediment
- Spark plug checked — gap confirmed at spec (typically 0.030"), electrode condition noted, replaced if 100+ hours or worn
- Deck belt and blade inspected — belt is matte, uncracked, properly tensioned; blade is balanced, not bent or obstructed
If you've worked through all five and the sputter persists, you may be dealing with a worn carburetor needle, a failing ignition coil (which heat-soaks under load and breaks down), or internal engine wear. At that point, a shop visit is genuinely warranted — but most load-related sputtering issues are solved somewhere in this checklist, usually at step 1, 2, or 3.
Don't Lose Track of What You Find
One of the most frustrating parts of DIY mower troubleshooting is doing the work, solving the problem, and then having no record of it. Next summer, when the mower sputters again after sitting all winter, you'll have no idea whether you cleaned the jet last year, when you last replaced the plug, or what condition the belt was in.
Tondio was built exactly for this. Log each maintenance event with the date, engine hours, what you found, and what you replaced. Add a photo of the spark plug condition or the inside of the carb bowl. Set a reminder to re-check the air filter at hour 25. It takes 90 seconds per session and saves you from re-diagnosing the same mower from scratch every season.
The Bottom Line
A sputtering mower under load is a solvable problem — and in the vast majority of cases, you can solve it yourself in under an hour with nothing but basic hand tools and a $10 investment in parts. The key is attacking the right problem. Load-related sputtering has a short list of causes, and they check in a logical order: air first, fuel second, ignition third, mechanical last.
Don't let a shop charge you a $75 diagnostic fee for something that's a clogged main jet and a 15-minute carb cleaning. Work through this list, trust the process, and get back to the lawn you've been working on all season.